Configuring the Cisco Content Security Appliance for Load Balancing
Procedure
Step 1 | [New Web Interface Only] On the Security Management appliance, click |
Step 2 | Choose Management Appliance > System Administration > LDAP. |
Step 3 | Select the LDAP server profile you want to edit In the following example, the LDAP server name is example.com. 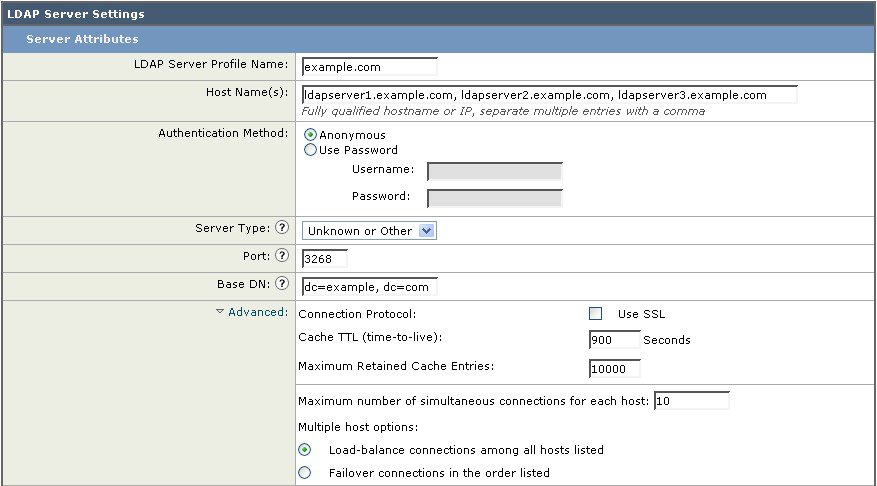 |
Step 4 | In the Hostname text field, type the LDAP Servers; for example ldapserver.example.com. |
Step 5 | In the Maximum number of simultaneous connections for each host text field, type the maximum number of connections. In this example the maximum number of connections is 10. |
Step 6 | Click on the radio button next to Load balance connections among all hosts. |
Step 7 | Configure other LDAP options as necessary. |
Step 8 | Submit and commit the changes. |
 to load the legacy web interface.